
A sand and cement screed is an essential layer in construction, providing a strong, level base for flooring. Its proper installation ensures durability, stability, and a smooth surface. However, achieving a fast-drying screed requires careful planning, the right materials, and attention to environmental conditions. This guide provides practical tips for preparing, mixing, and applying a sand and cement floor screed that dries efficiently while maintaining strength.
Choosing the Right Materials
Selecting high-quality materials plays a critical role in the drying process. The sand should be clean, free of dust, clay, or organic matter. Sharp or coarse sand often improves bonding and reduces shrinkage, while fine sand may result in weaker screeds. Cement should be fresh and stored properly to prevent moisture absorption, which can affect curing.
Water content is equally important. Excess water can prolong drying and weaken the screed. A mixture with too little water can be difficult to work with and may not spread evenly. Generally, a water-to-cement ratio of 0.5 to 0.6 provides sufficient workability while allowing the screed to dry more quickly.
Preparing the Subfloor
Before laying the screed, the subfloor must be clean and stable. Remove dust, debris, and any loose particles. A layer of bonding agent or primer can improve adhesion, especially when applying screed over concrete or existing floors.
Sealing gaps around walls or edges with tape or foam prevents moisture loss during drying. It also helps contain the screed in the desired area, allowing for a more uniform finish. Preparing the subfloor thoroughly can reduce cracks and ensure the screed dries evenly.
Mixing Techniques
A consistent, well-mixed screed is crucial for quick drying. Manual mixing with a shovel or mechanical mixing with a concrete mixer ensures that sand, cement, and water are evenly combined. Avoid adding extra water after mixing, as this can weaken the final layer.
For faster drying, smaller batch sizes can be easier to manage. Mixing only what can be applied in a short period ensures that the screed does not begin setting before spreading. Consistency in texture is essential, as uneven mixtures may result in uneven drying times across the floor.
Application Tips
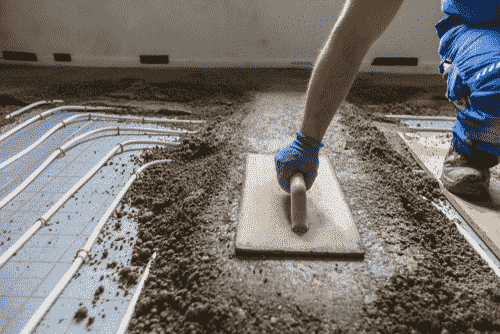
Proper application techniques influence both drying time and finish quality. Spread the screed evenly using a straightedge or screed board. Start from one end of the area and move systematically to prevent pooling or low spots.
Avoid overworking the screed. Excessive troweling can bring water to the surface, slowing the drying process. Instead, lightly level the surface and allow it to settle naturally. Achieving a uniform thickness is important, as uneven screeds may dry at different rates, leading to cracks or weak spots.
Thickness Considerations
The screed thickness directly impacts drying speed. Thinner layers dry faster but may not provide adequate strength for heavy use. Thicker layers offer durability but require more time to dry completely.
A typical sand and cement floor screed should be between 25 to 50 millimeters for standard flooring applications. Reducing thickness where possible can accelerate drying, while maintaining structural integrity. In areas requiring heavy loads, additional care is necessary to balance drying time and strength.
Environmental Factors
Temperature, humidity, and ventilation strongly affect how quickly a screed dries. Higher temperatures can speed up evaporation, but very hot conditions may cause cracking if the surface dries too fast. Cold or damp conditions extend drying time and may require temporary covers or additional heating.
Ventilation improves airflow, promoting consistent drying across the entire surface. Avoid exposing freshly laid screed to direct sunlight or strong winds, as these can cause uneven drying and surface cracking. Controlling the environment ensures that the screed sets properly while reducing the total drying time.
Curing and Protection
Curing is a critical step that should not be skipped. Lightly misting the surface with water or covering it with damp hessian keeps moisture in the screed, preventing rapid drying that can weaken the material. Curing for at least seven days strengthens the screed and improves long-term durability.
Protection from heavy foot traffic and furniture placement is essential during the initial drying period. Applying pressure too early can create indentations or cracks, compromising the floor’s integrity. Planning access and load placement ensures the screed develops maximum strength.
Quick-Drying Techniques
Several methods can help accelerate drying without compromising quality. Using additives such as rapid-set cement can reduce setting time, but these should be carefully measured and tested to avoid unexpected results.
Maintaining consistent airflow with fans or controlled heating systems can also improve drying speed. Avoid extreme measures, such as high heat or strong air currents, as these may dry the surface unevenly while leaving moisture trapped beneath.
Layering can further influence drying. When multiple screed layers are required, each should dry adequately before the next is applied. This prevents moisture from becoming trapped, which can delay drying and weaken the structure.
Preventing Common Issues
Cracking is the most frequent problem with sand and cement screeds. Proper thickness, adequate curing, and controlled drying conditions minimize this risk. Shrinkage may occur naturally but can be managed by using the correct sand-to-cement ratio and avoiding excess water.
Uneven surfaces result from poor leveling or inconsistent mixing. Careful spreading and frequent checks with a straightedge help maintain a flat, even finish. Regular observation during the drying process allows for adjustments before the screed sets.
Maintenance After Drying
Once the screed has dried fully, it should be inspected for minor imperfections. Small cracks or uneven areas can be smoothed with a thin topping layer. Ensuring the surface is clean and dust-free prepares it for final flooring installation, whether tiles, laminate, or carpet.
Maintaining a stable environment after drying prevents sudden moisture changes that could compromise the screed. Avoid exposing the floor to water leaks or high humidity until the covering is installed.
Conclusion
A well-prepared sand and cement floor screed provides a reliable, level base for any flooring project. Quick drying requires attention to material quality, proper mixing, and environmental conditions. By following these tips, including careful subfloor preparation, correct thickness, and controlled curing, a durable and smooth surface can be achieved efficiently. With proper application and protection, the screed will provide long-lasting performance and a professional finish.